Showing posts with label DIY. Show all posts

5/29/2012

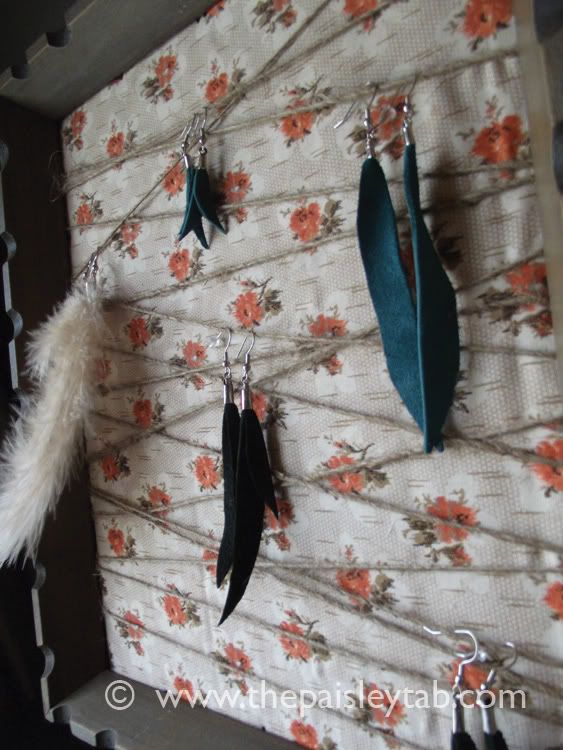
Make it Monday: DIY Jewelry Display

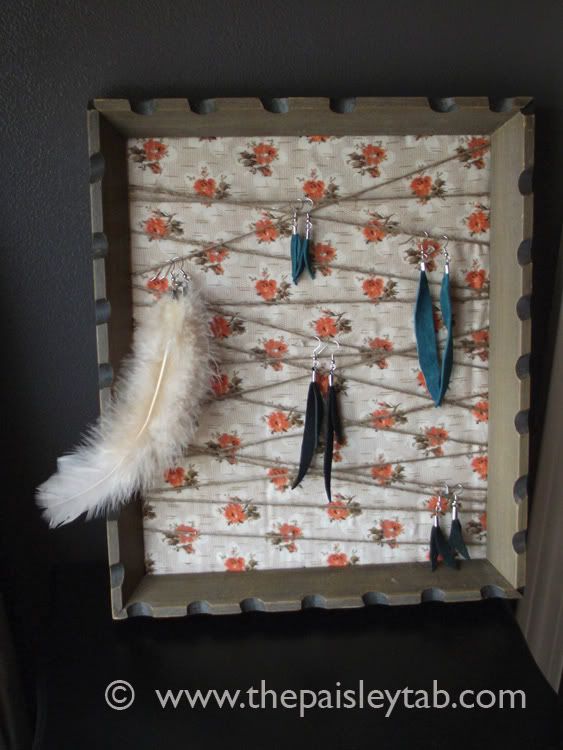
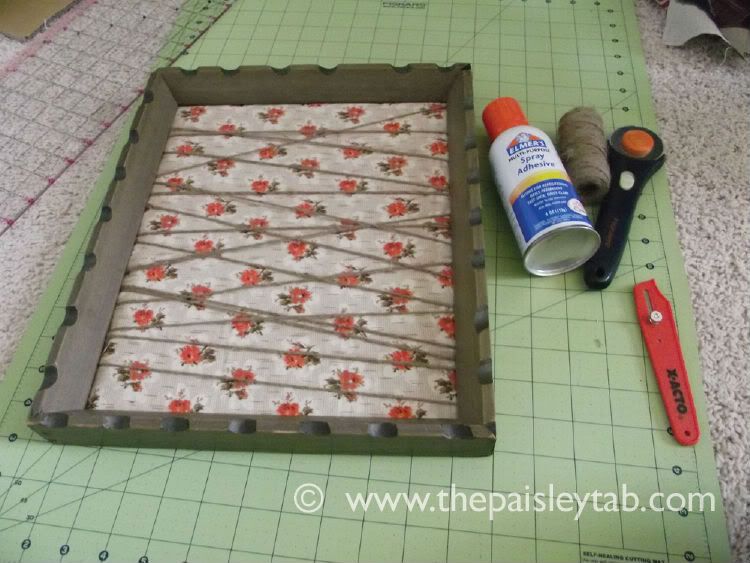
I'm preparing for a craft show in a couple weeks, so I needed to create a way to display some of the jewelry I've been making.  This Jewelry frame would be perfect for either a craft show, or just a great way to display your jewelry at home - in an organized manner so you can see what you have & you'll know where your jewelry is when you want to wear it! 

WHAT YOU NEED:
Frame (I picked mine up at Goodwill.)
Spray Adhesive
Cardboard or Foam Core
Fabric (I went with some vintage fabric I found at an Antique shop.)
Jute string
Tools to cut fabric and cardboard
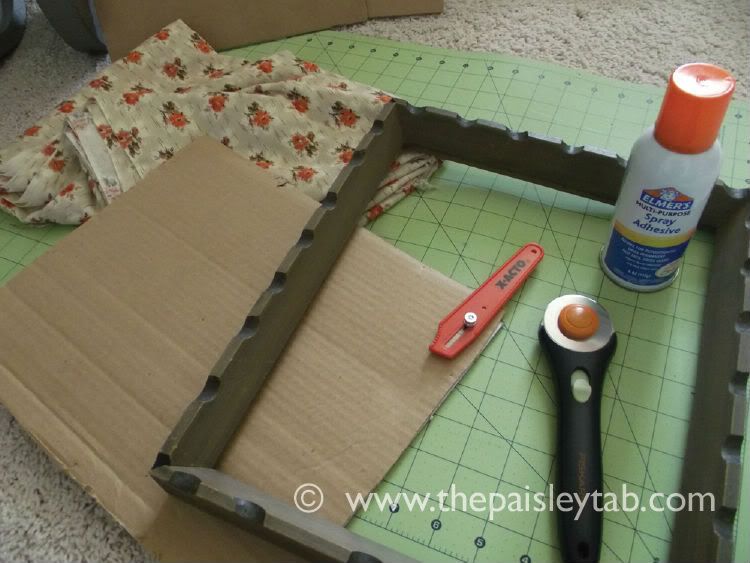
STEPS:
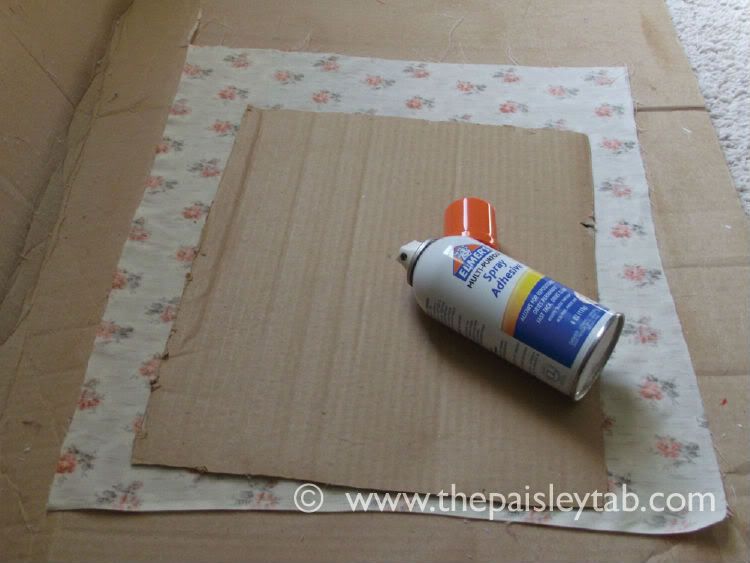
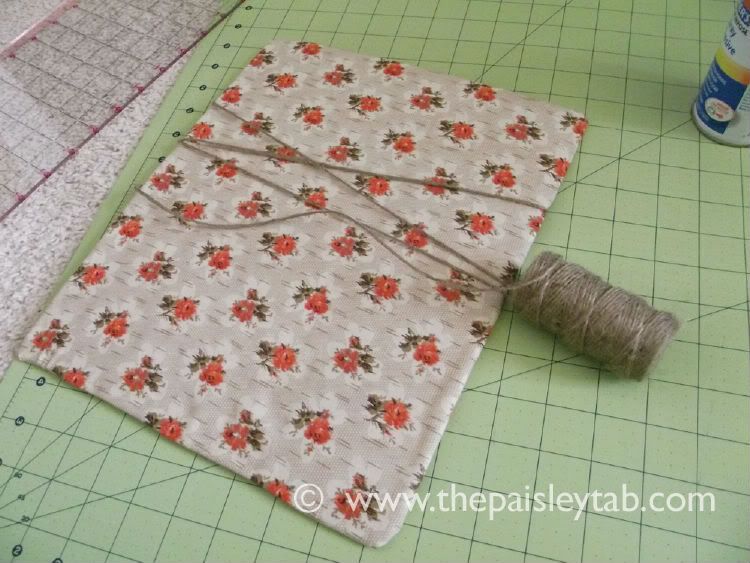
1. Trim fabric to be slightly larger then your cardboard.
2. Spray Adhesive to cardboard. 
3. Place stickyside down on backside of fabric.
4.Wrap edges around cardboard.
5. Wrap Jute string tightly around fabric board.
6. Place fabric board inside frame.
Voila!

1/14/2012

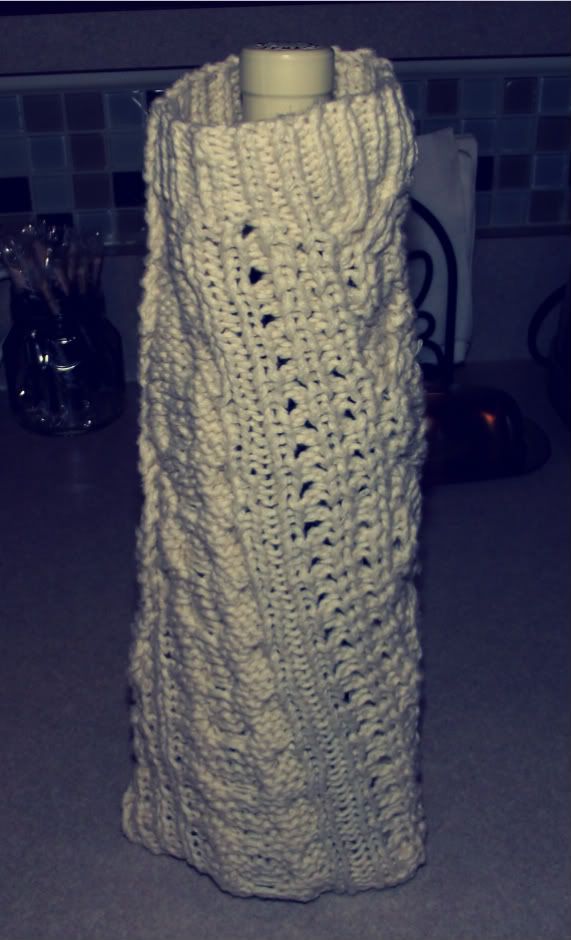
DIY - Wine Bottle Koozie

I love creating something 
NEW from something OLD!  
The other day I was wearing a sweater and my husband told me it looked "frumpy".  I didn't mind the sweater, but I appreciated his honesty, so I started thinking about what I could make with it because I liked the overall look.  In five minutes,....I had myself a wine bottle Koozie.  Fact: nobody needs a wine koozie, but you know I'm a firm believer that "ordinary is boring", so I pulled one of my Francis Coppola Wine bottles off the rack and wrapped it in this nice, cozy sweater.  It's also a great hostess gift idea - if you're taking a bottle to a party!  
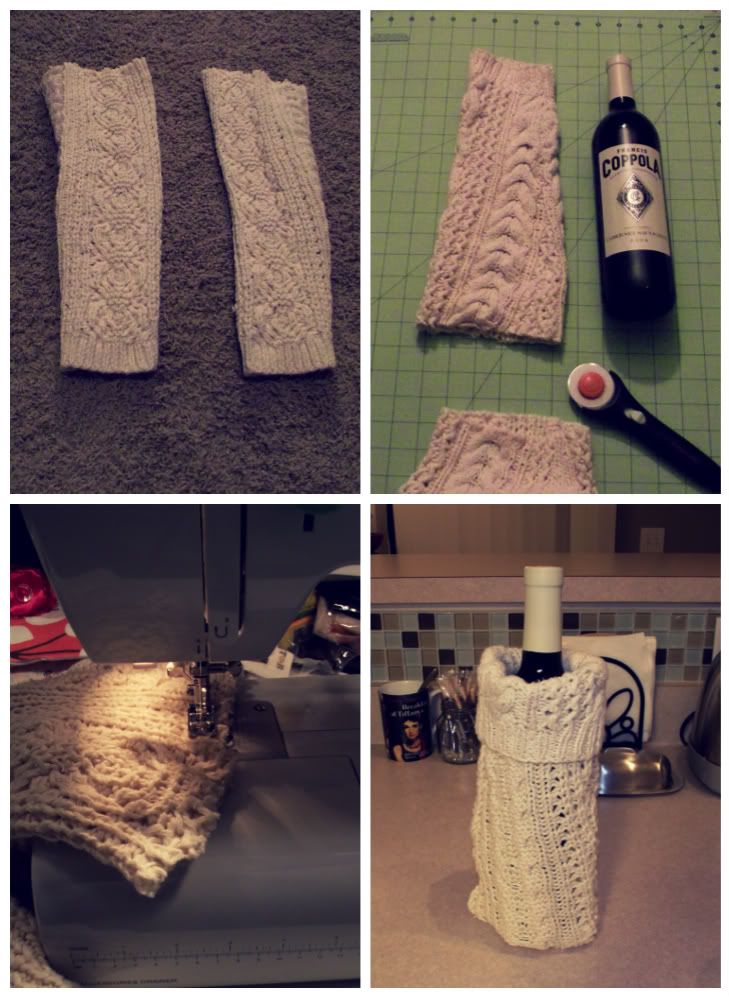
See below for the easy steps:
1.  Turn sweater wrong side out & remove sleeves at the armpit.
2.  Line sweater up next to bottle for length dimensions & trim.
3.  Stitch the raw edge end of sweater.
4.  Slip your bottle of wine in sweater & pat yourself on the back.

5.  Pop a cork, pour yourself a glass, sit back, relax, & sip away!

12/15/2011

DIY Jewelry Display

Turn your jewelry into a piece of art.
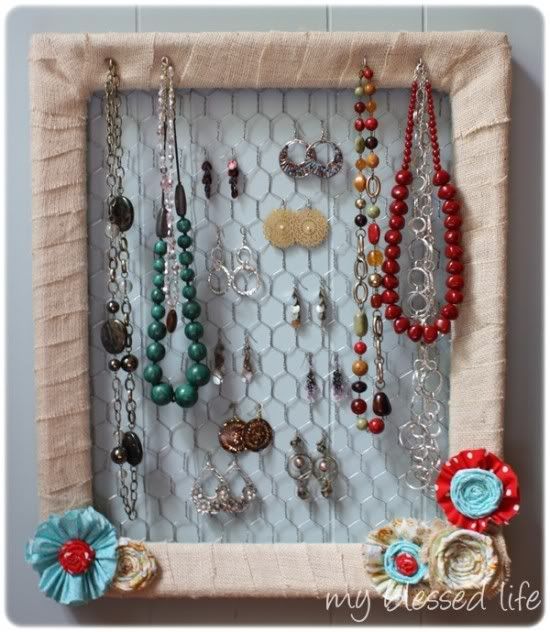
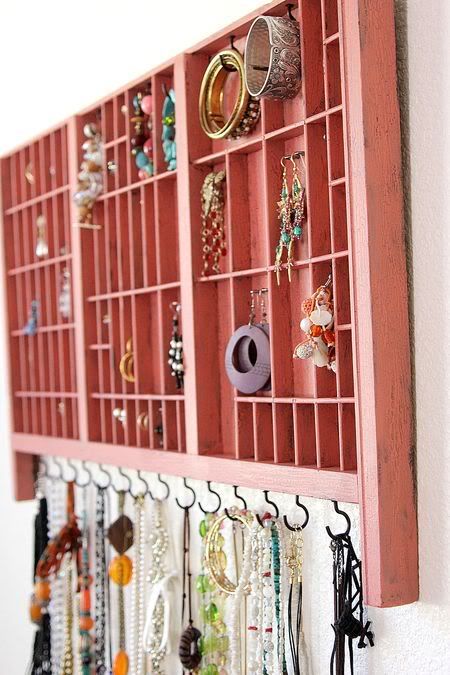
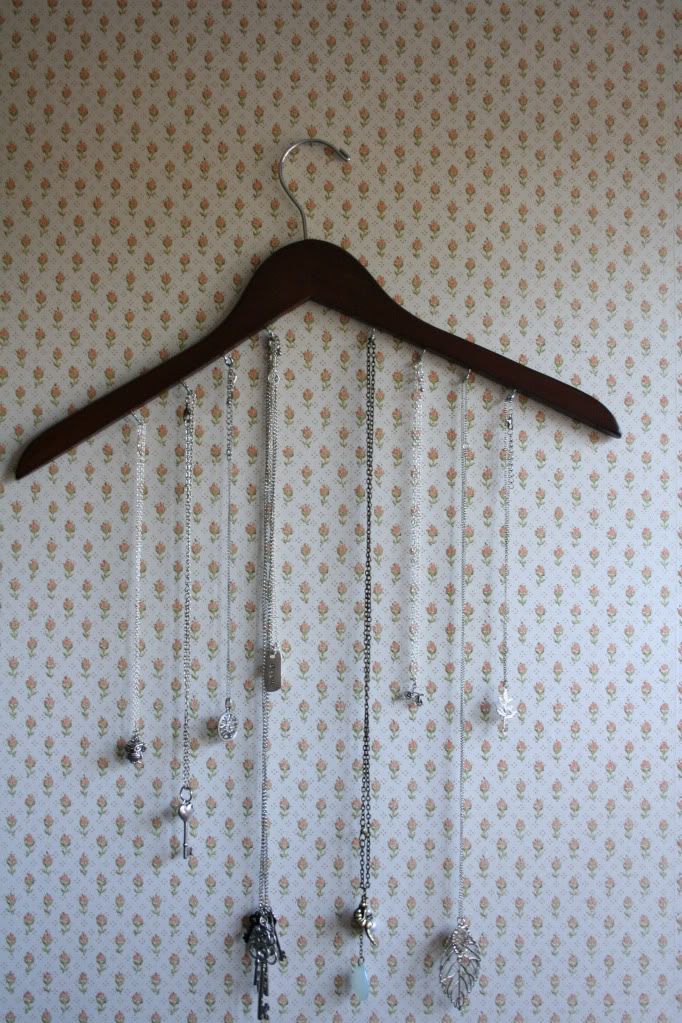
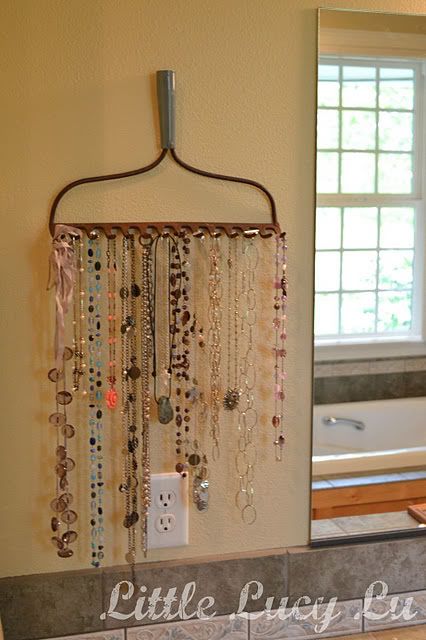
I don't know about you, but I frequently find myself frustrated, wasting valuable time untangling my knotted necklaces - which usually results in something getting damaged.  Here are some clever ideas that others have created to display their jewelry.  Exactly what I needSimple, clean ideas.  Easy to see, never tangled, never lost, never damaged.  GORGEOUS!
Framed Jewelry Display Ideas
via
Frame with Burlap & Chicken Wire
via
Clean & Simple Frame with Hooks


via
Antique Printers Tray (Shadowbox) with Hooks


Pegboard & Decorative Knobs 
Additional Jewelry Display Ideas
via
Towel Rack with Shower Curtain Hooks 


via
Antique Rake 

via
Hanger with Hooks 

If you L O V E these ideas, but don't feel like making your own, check out  E T S Y  for some lovely, handmade jewelry displays that others have made! 

12/01/2011

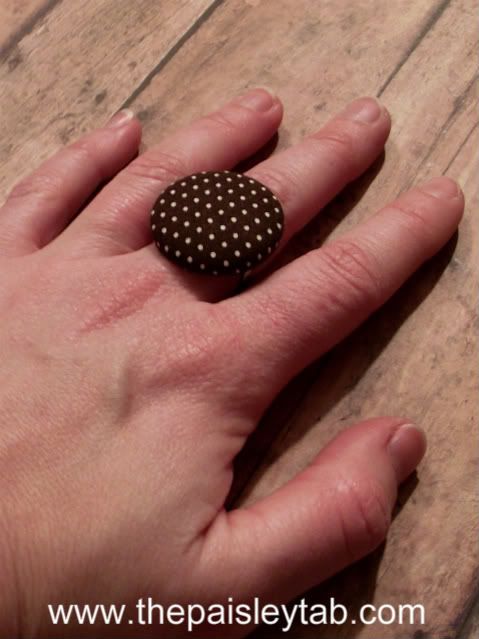
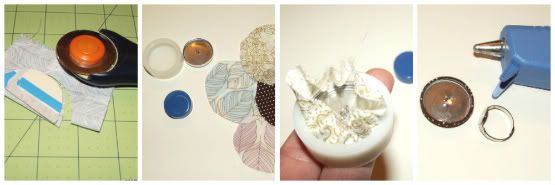
DIY - Fabric Covered Button Ring


What you need:
Fabric Scraps
Button kit
Scissors or rotary cutter
Hot glue gun
Ring
What you do:
1.  Use pattern on package to cut out fabric
2.  Place fabric scrap in button mold
3. Use your plunger to push button back and secure fabric
4.  Hot glue ring to back of button

                     MORE OPTIONS:                    

Ring   //   Thumb Tac   //   Magnets


-Tiffany
{The Paisley Tab}

Photobucket

PhotobucketPhotobucketPhotobucketPhotobucket

11/24/2011

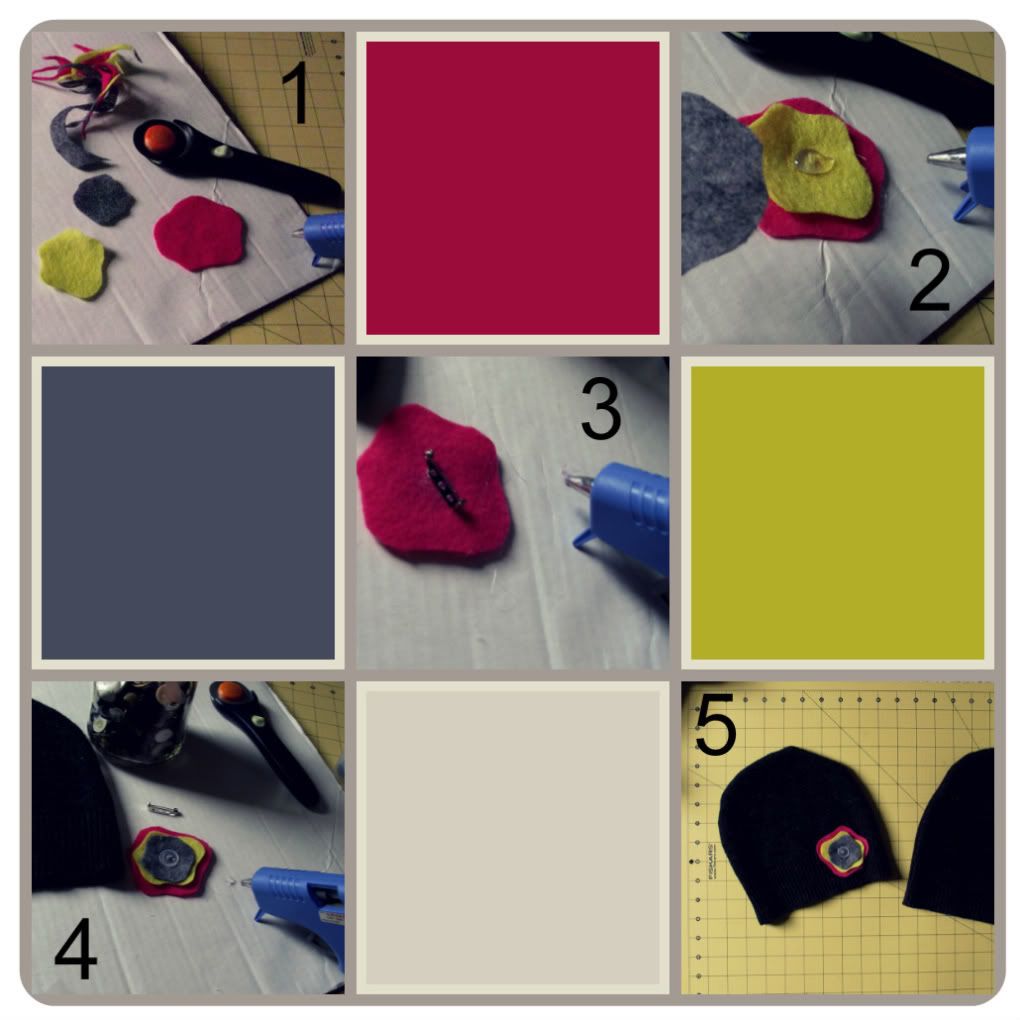
DIY Felt Flower Pin

{DIY Felt Flower Pin}
What you need:
Felt, Hot Glue Gun, Button, Pin
How you make it:
Step 1:  Pick your felt pieces and cut out your flowers.
(You can use as many layers as you want.)
Step 2: Hot glue your felt layers together
Step 3: Hot Glue pin to back of bottom felt layer 
Step 4:  Hot Glue or sew a button in center
Step 5: Attach to a hat, shirt, purse, jacket etc. - As I did HERE!

HAPPY THANKSGIVING!
Wishing you the very best!

Check back on Black Friday for a special offer at 
The Paisley Tab!

LOVE,
Tiffany

11/23/2011

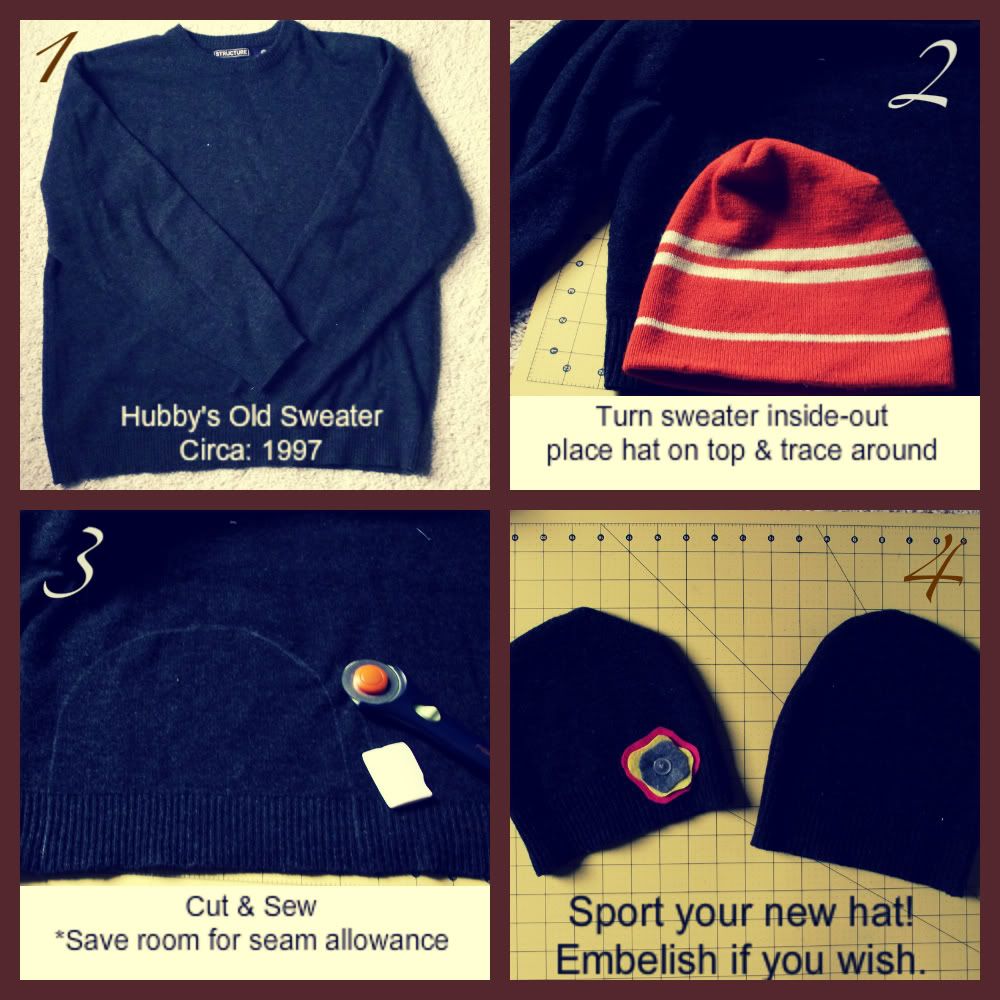
DIY - Stocking Hat

Keep your ears toasty warm this winter 
with this 5 minute DIY stocking hat!
I tried to consign my husband's old "Structure" sweater - but nobody wanted it.  It did not sell.  I wander why? Or the better question is probably - why did he still have it?...Ha-ha...that was so 90's!  Usually if my stuff doesn't sell, I donate it to charity, but I decided to work with this one and create something new from something old.  It was a success! :)  I now have two knew hats! ...AND a lot of leftover sweater, so I'll probably whip together a few more things!

10/13/2011

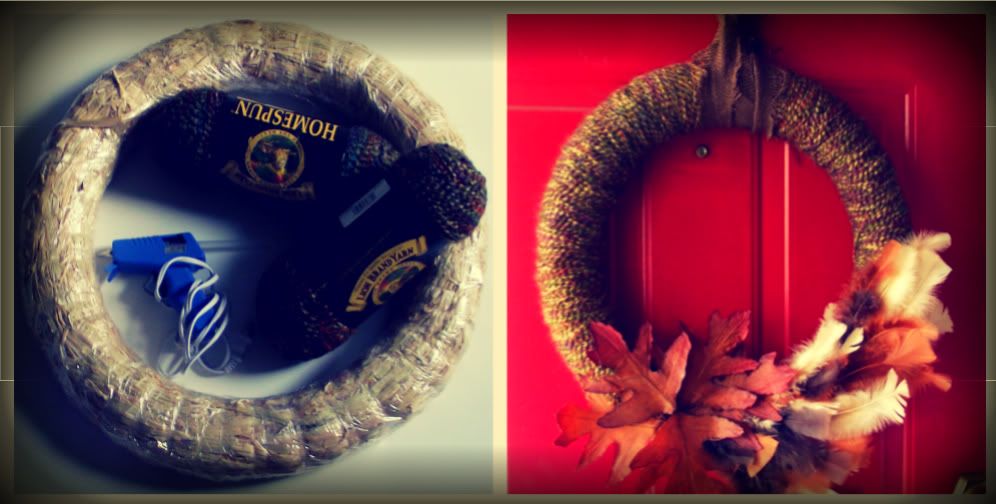
DIY - Fall Wreath

{DIY Fall Wreath}
This is an easy wreath to make to help set the mood for this lovely time of year.  You can make it as elaborate or simple as you like.  All you need is a foam/straw wreath from the craft store as your base.  I had some yarn leftover from back when I knitted. (That hobby only lasted for about 20 minutes so I have lots of yarn left).  Next all you need to do is wrap the yarn all the way around the wreath.  When you're done with that you can embellish it with whatever you wish.  Garland, leaves, corncobs, feathers, acorns, pine cones, etc.

Voila!  You have a new Fall wreath! 
8/31/2011

Get Ready For Fall!

Photobucket

Looking for some new Fall crafts to make?  
Well, it just so happens that EverythingEtsy was so kind and gathered together 101 fabulous Fall tutorials!

I am especially fond of these tutorials:
the upcycled scarflette at:
I am Momma Hear me Roar! 

the pine cone garland at:
Twig & Thistle
 

.....but that's just a taste of the fun...
there are 97 more tutorials!

You don't need to surf around cyberspace, 
if you don't see it on this list, then I don't think it exists!
Today is the last day of August.  
Where did the time go?
  
Fall is just around the corner!  
This is such a fun/cozy time of year.  
Click over to EverythingEtsy and get your Craft on!

-XOXOXO,
Tiffany

Photobucket

PhotobucketPhotobucketPhotobucketPhotobucket

8/30/2011

{DIY} - 5 Minute T-shirt Necklace

{ D I Y }
~ 5 Minute T-shirt Necklace ~
What you need:
t-shirt, scissors or rotary blade, & cutting mat
Photobucket
Directions:
1. Trim shirt in 3/4" - 1" strips.
2.  Gather trimmed strips and lightly tug until strips begin to curl.
3. Optional: Keep out 1 strip, gather strips together.  Wrap all strips, tuck in the end.
4. ROCK OUT YOUR UPCYCLED TEE/SCARF
Photobucket
These are gaining popularity and they are so cheap, easy & quick to make.  People are making and reselling them for ridiculous prices.  All you need is 5 minutes and a tee that you are ready to part with.  When you're done, you will be happy that you didn't toss that old tee because it will be a whole new creation // accessory // conversation piece.  AND when someone compliments you, you can say with pride: "thanks, I made it"!  

6/13/2011

Make it Monday: DIY Candle

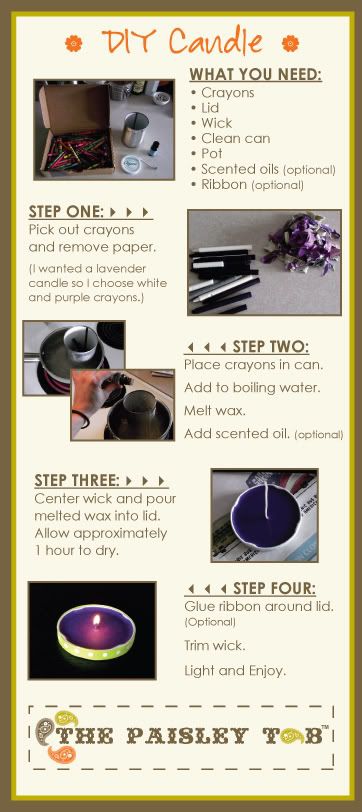
The other day I was cleaning the house and I came across a box of crayons. I don't have kids and I don't color, so I was about to toss them in a stash of stuff to donate to Goodwill, but then I thought...hmm...I think I'm going to try to make a candle with some of these crayons - and that is just what I did. See below for the instructions so you can make your own candle. It's so easy! Click the image to enlarge.

Click above to enlarge.

6/10/2011

DIY Leather Eyeglass Case

Until now, I have only sewn projects with cloth, but back in December a friend of mine told me about this segment that she saw on Good Morning America.  On the show, Project Runway finalist, Laura Bennett demonstrated how to make a DIY leather eyeglass case.  I bought all the materials -  leather, hardware, needles, etc....etc...awhile ago, but I finally just got around to making it.  I actually made two cases.  On the program, Laura talked about gluing the leather together.  That sounded strange to me, so I decided to sew mine.  ...And holy cow, that was a challenge!  It was a big enough struggle that I decided to try my hand at gluing the second one, since that  was how Laura did it and it turned out fine.  I was a little skeptical at how well it would hold, but I think it's pretty sturdy.  Sewing with leather was tricky, so I think I'll dig around for some tips before I give it another whirl but I  am so not giving up!  If you are interested in making one of these snazzy cases, click HERE for the step by step tutorial, or scroll down for the video.  

Happy Friday my loves! 
Have a GORGEOUS weekend!


The Paisley Tab
is HOT!  Please Fan Us


2/27/2011

It's Sew Saturday...

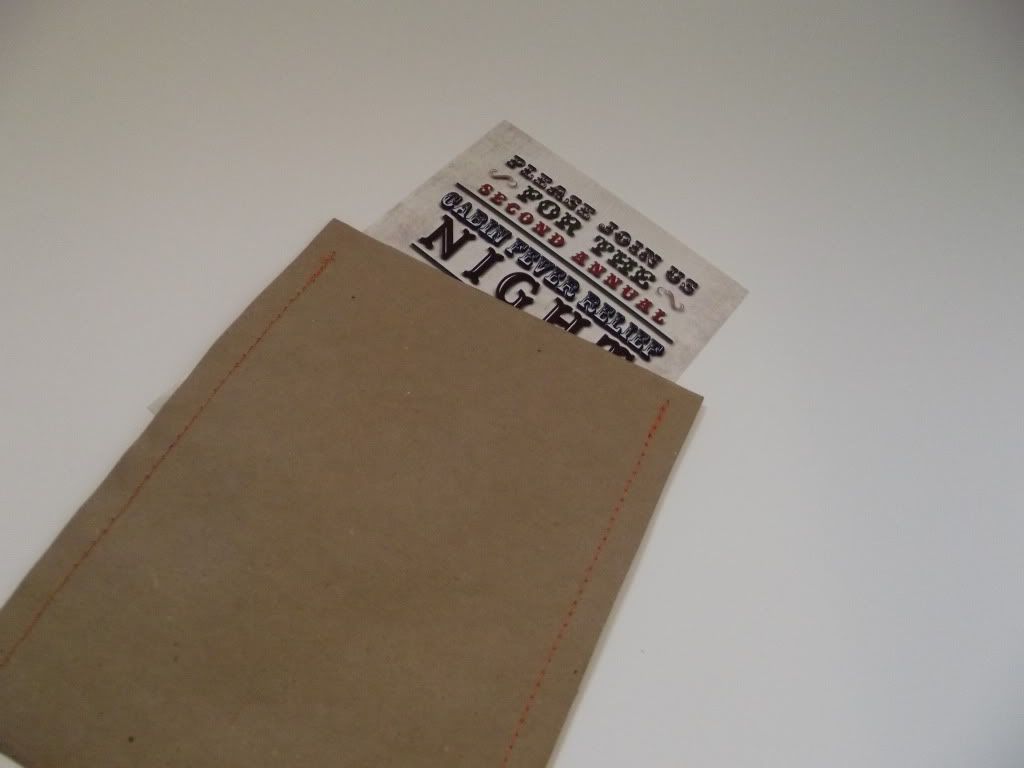
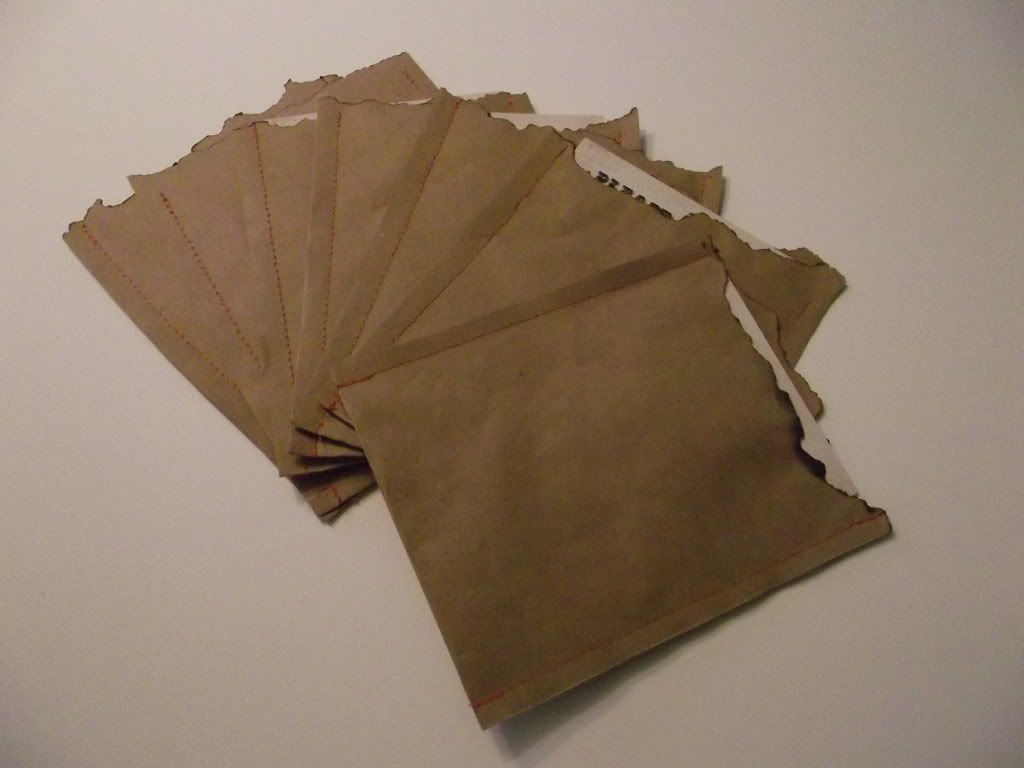
...and what makes today different than all the other Sew Saturdays? Well, today I'm not sewing on fabric. ...I'm making a little switch-a-roo to paper.   "PAPER"? - You say? Yes, paper.  Why?  Because ordinary is boring, so I decided to whip up - or rather stitch up some invitation sleeves for our neighborhood party. ...And I thought I'd share the easy four-step instructions for this very inexpensive project.  Let's get started!
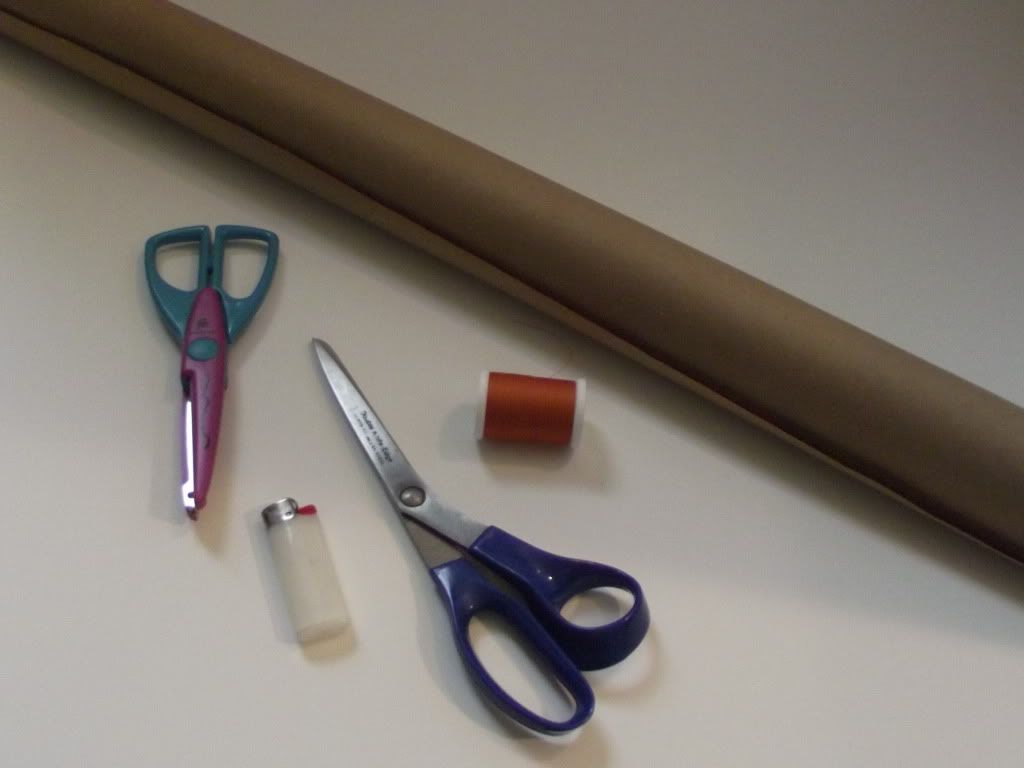
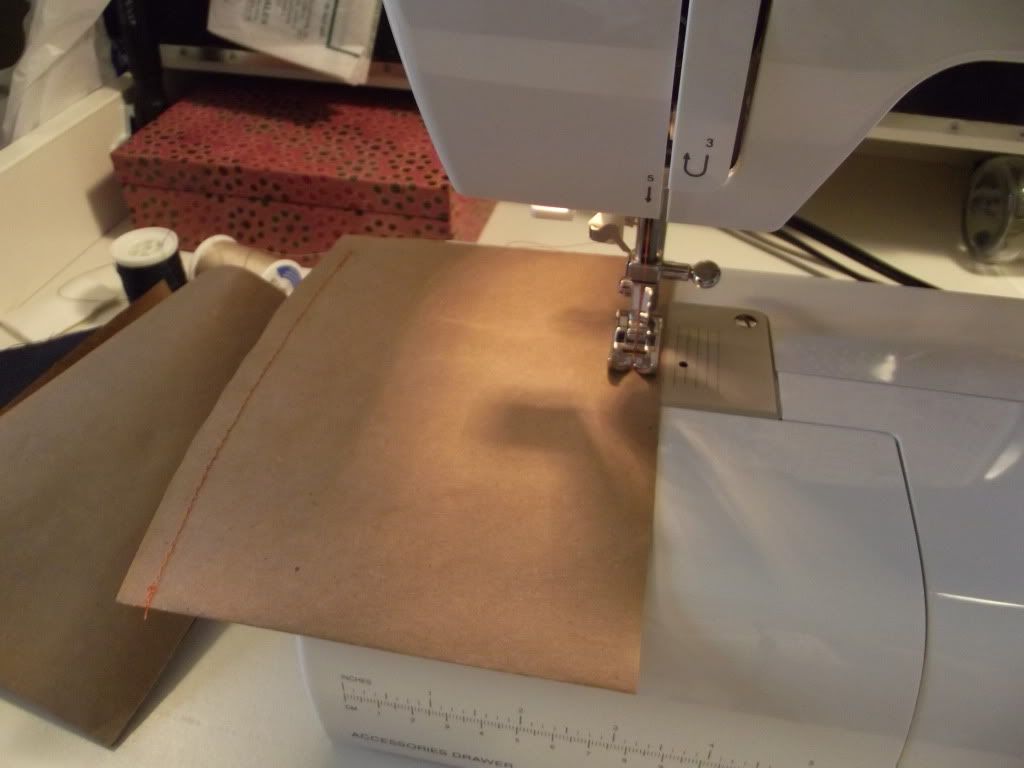
Supplies needed: You will need thread, scissors, textured scissors (optional), paper bag, and a lighter.

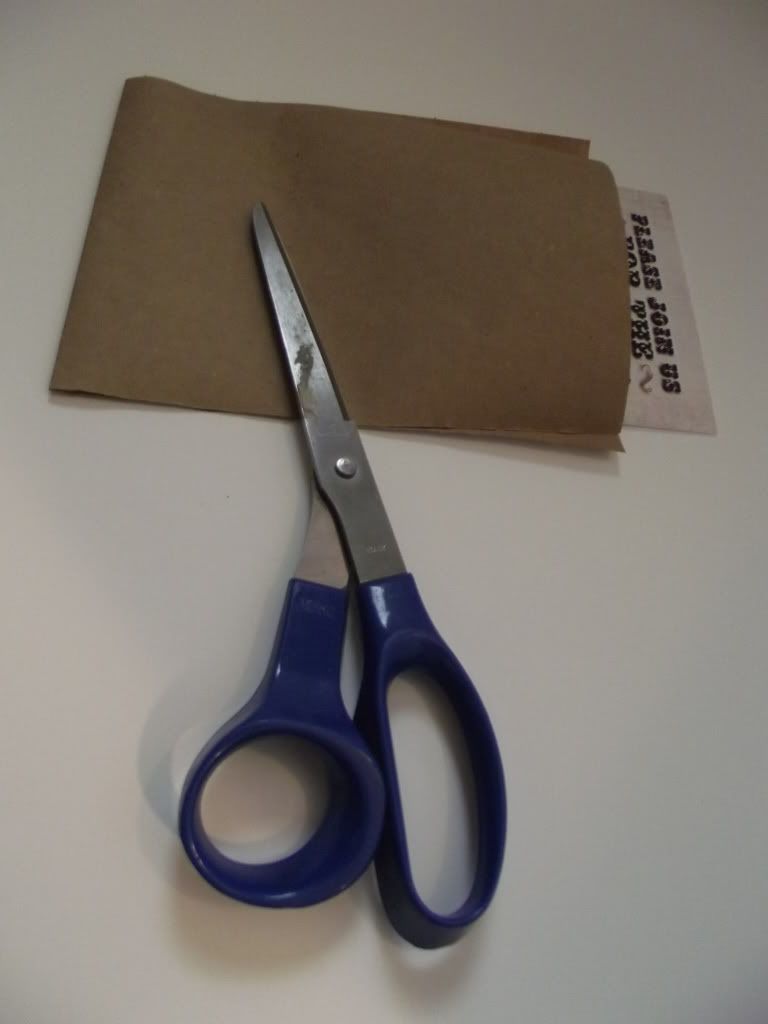
Step 1: Cut out a piece of paper double the length of your invitation allow a little extra space on the sides to allow room for invitation and for seam allowance.

Step 2: Stitch the sides closed.  I did a standard straight stitch, but you can do any stitch.  Don't be shy - get as crazy as your creative little heart desires!

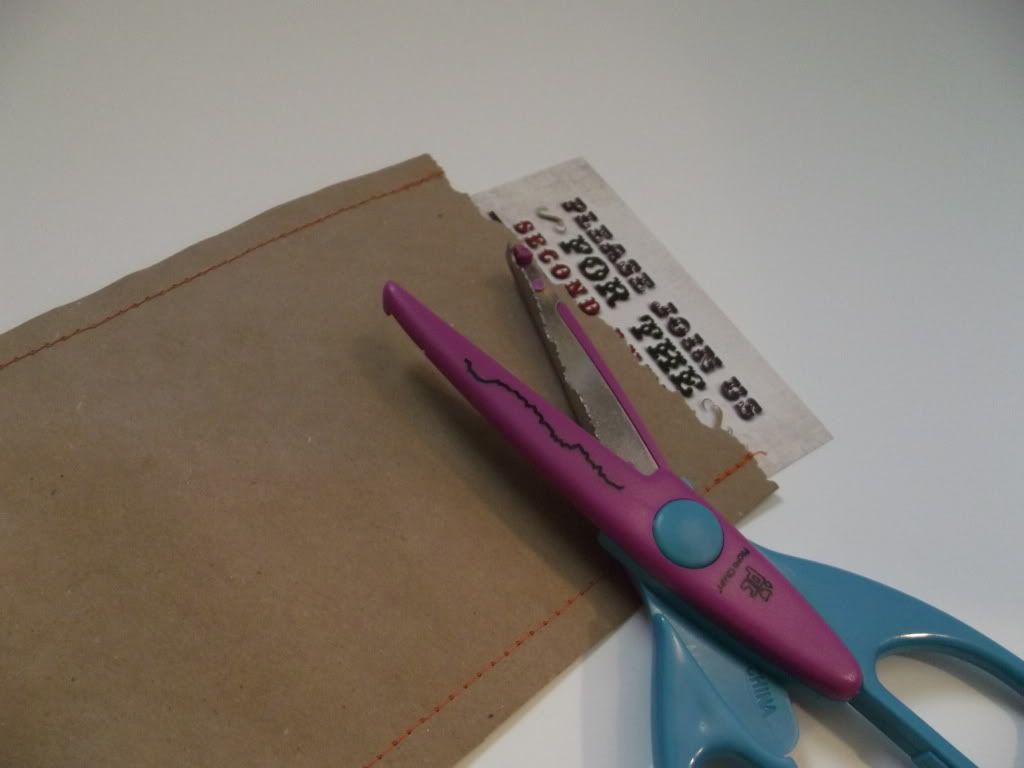
Step 3: Cut off the top.  I started off using these textured scissors to give it a rough-torn look, however in the next step you will find that it's really not necessary.  I decided to keep this step in the mix in case you don't feel comfortable doing #4.

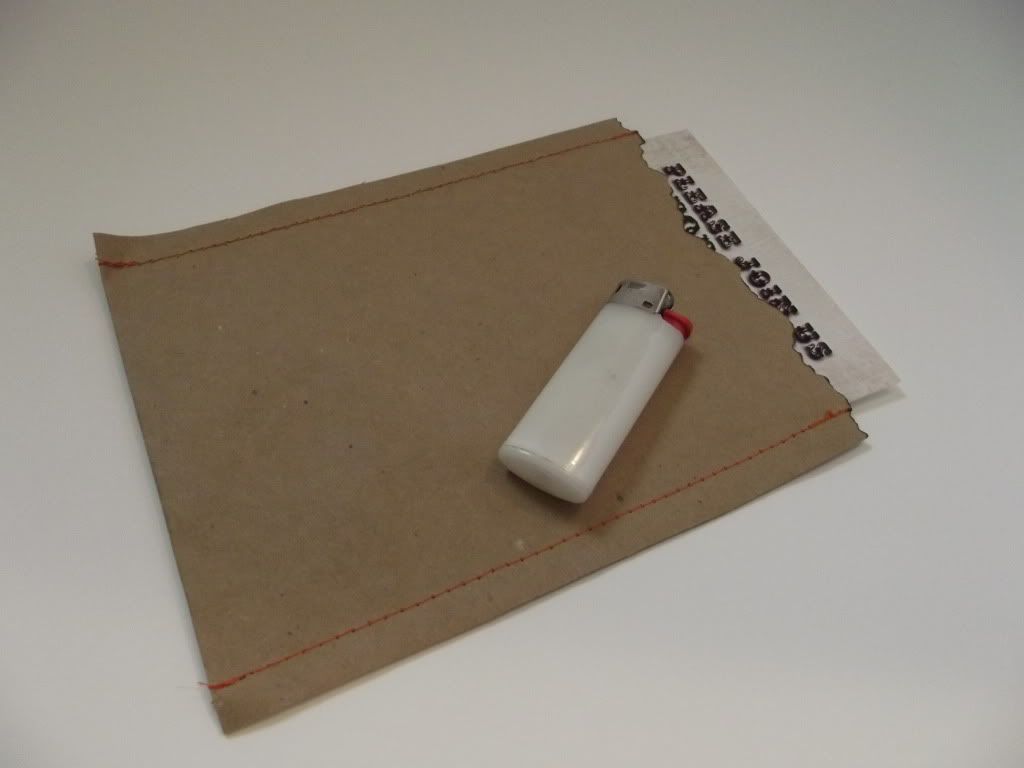
Step 4: Warning this is a stinky step! Grab your lighter and singe the top-opening section of the invitation sleeve.  Blow out the flame quickly, it only needs a second to singe down.   Be-careful.  If you don't feel 100% safe doing this, grab a spray bottle - for the unlikely event that you need to spray out the fire.  If you don't use texturing scissors, the flame will have the same effect on the paper.

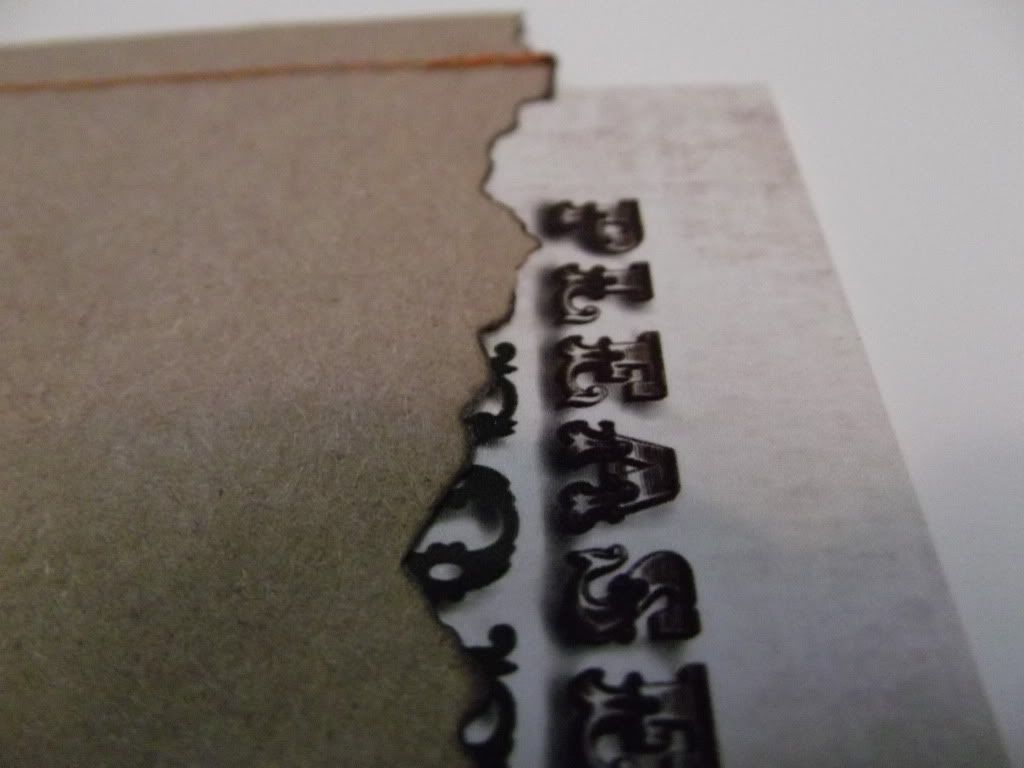
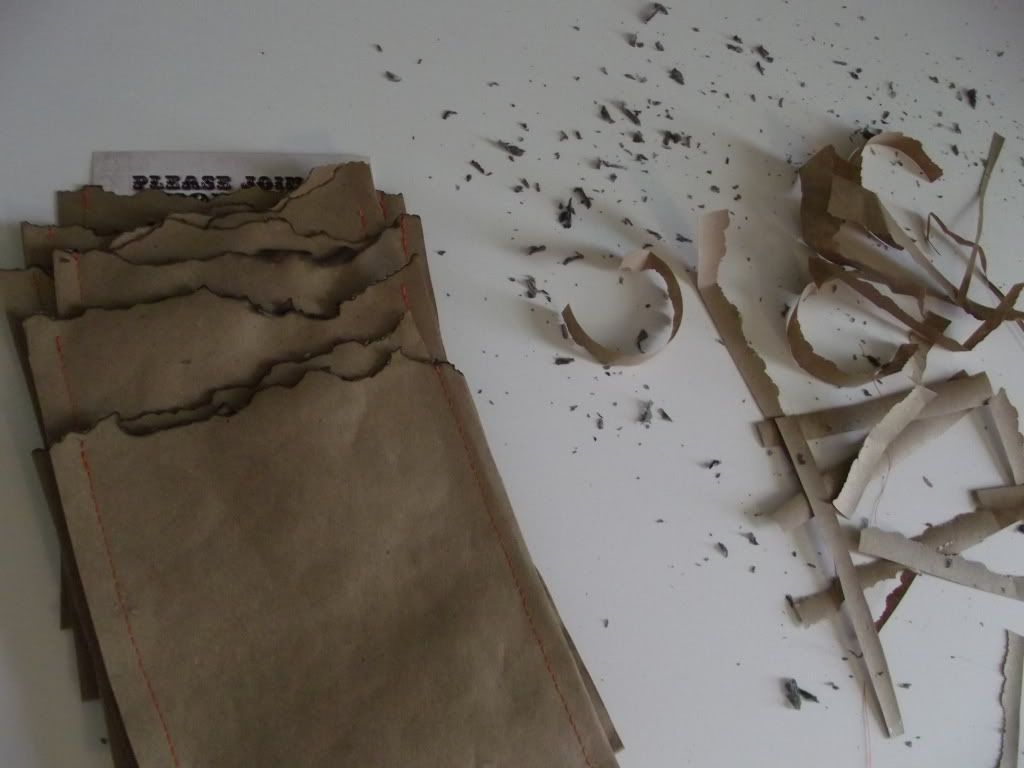
Here is a close up of what step 4's effect does to your paper.
The finished product.
The aftermath - paper shavings and ashes.
Click on above images to enlarge.

1/22/2011

DIY Manicure at home


Pop sugar posted this wonderful tutorial for a professional manicure. Follow these easy steps and you can get a gorgeous, Salon quality manicure without ever leaving the house. Now, pocket that money, because you'll need it for a coffee later.

1/21/2011

Afro-tastic!


I found this video today... on lovemaegan.com and I'm dieing to try it.  I've always wanted to try an afro for a day...and this tutorial gives me all the instructions to do it.  I have naturally curly hair that I straighten everyday.  The problem is that my natural curls are lumpy and unattractive.  ... But if I could get the tight curl and overall poof without the chemicals of a perm...then bring it on!
Related Posts Plugin for WordPress, Blogger...